MACI knee cartilage repair is the third generation of autologous chondrocyte implantation (ACI), and it advances upon previous ACIs by offering surgeons a simpler, shorter and more versatile procedure to repair patients’ articular cartilage defects of the knee using an implant generated from their own cartilage cells (prior generations of ACI required a periosteum or collagen membrane cover).
MACI surgery can have multiple benefits including:
- It can be implanted via mini arthrotomy.
- The procedure is less invasive, with fewer steps than prior generations of ACIs, reducing operative time.
- The MACI membrane can be custom trimmed to the size and shape of any defect in most areas of the knee.
- A patient's characterized cells are distributed onto the MACI membrane in a density of 500,000 to 1,000,000 per cm2 using the proprietary Uniform Loading Unit (ULU™) which allows for the application of a consistent dose of cells regardless of defect size.
- The MACI membrane can be secured with fibrin sealant alone, but also permits the use of sutures or suture anchor fixation when needed.
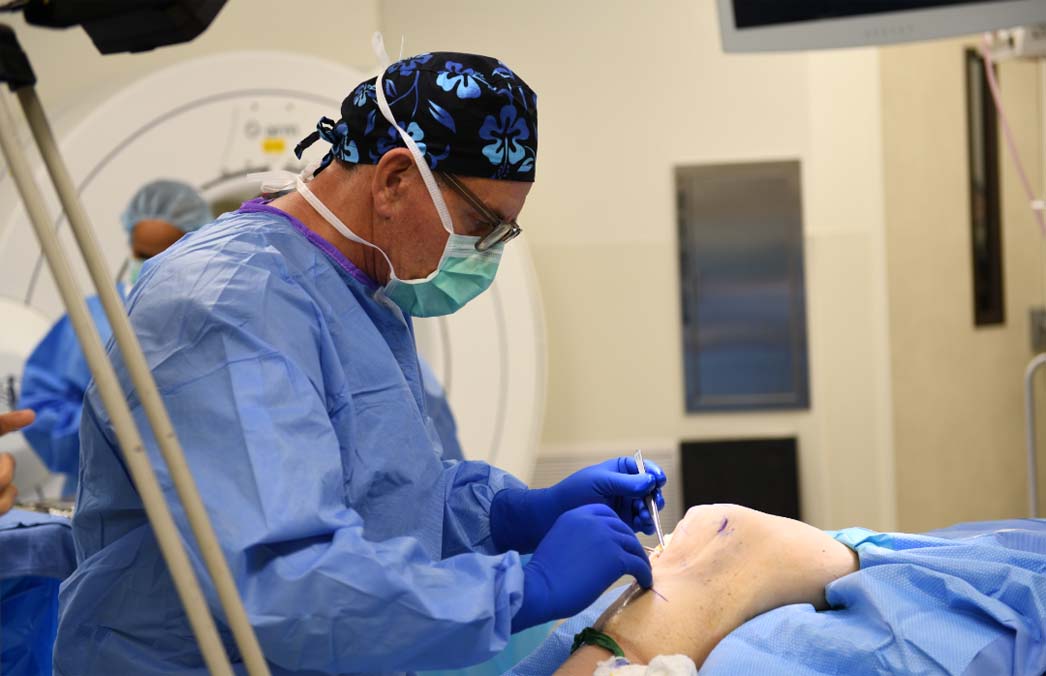
To help you explore the features of the procedure, we gathered best practices for performing MACI to inform your surgical approach for MACI. The following practices do not constitute medical advice, and patients should be assessed according to their unique circumstances.
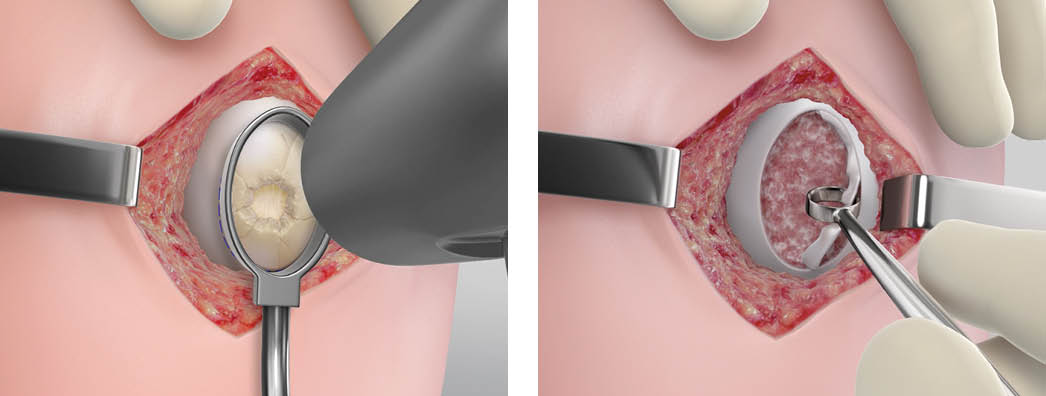
Step 1 – Preparing the Defect
The knee joint will be accessed via mini arthrotomy and assessed.
Next, to prepare the defect, the surgeon will take advantage of tools in the MACI implantation tray. Create a uniform template of the knee cartilage defect with the MACI customer cutter. With the provided mallet, tap the MACI custom cutter down to the subchondral bone. Use the ring curette to debride the damaged cartilage, including the calcified layer, back to vertical walls of healthy cartilage. Hemostasis must be achieved prior to implantation using hemostatic agents.
Best Practice: When using the MACI custom cutters, allow 2-3 mm of cartilage to exist between the defect and the ring walls. When removing the defect, use the tools angled toward the center of the defect in case they slip.
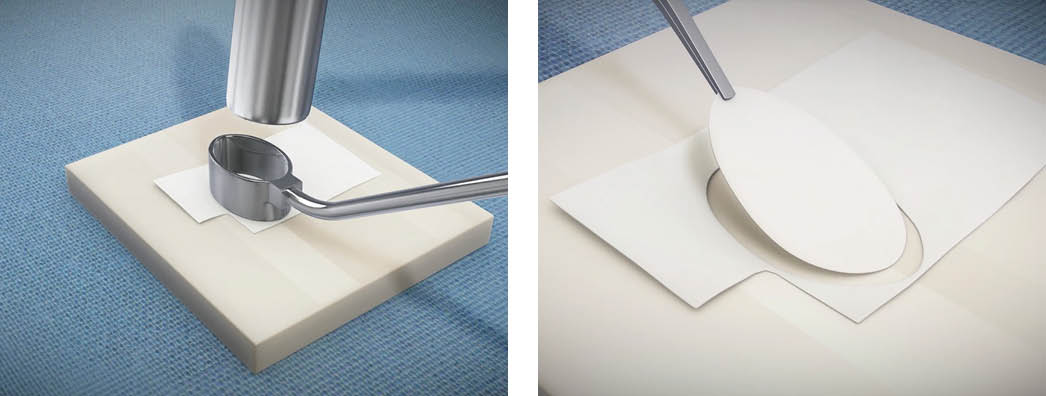
Step 2 –Customizing the MACI Implant
Surgeons will customize each MACI membrane to fit the size and shape of each debrided knee cartilage defect.
Take the same custom cutter and mallet used to outline the cartilage defect and size the MACI implant to identically fit the template.
While surgeons do not have to use the custom cutters, the option to create templates using these tools makes MACI highly reproducible and provides a line to line fit.
Best Practice: The MACI implant has a rough and a smooth side. The cells are seeded on the rough side. The MACI implant should be cell-side up. Keep track of the notch in the lower left corner to denote the cell-side is facing up.
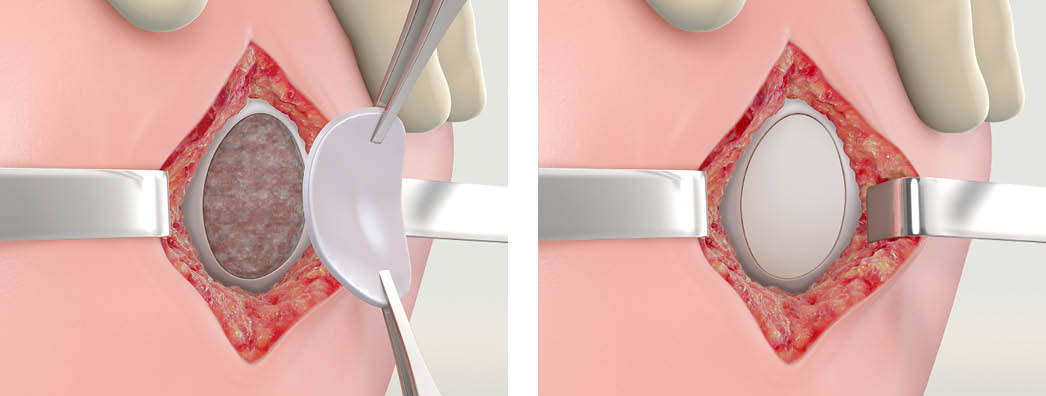
Step 3 - Placing the MACI Implant
Apply a thin layer of fibrin glue to the defect area. The implant should be implanted with the cell-side facing the subchondral bone (the cell-seeded side has a rougher texture). Additional fibrin sealant can be applied to the rim of the implant. Apply light digital pressure to the implant for three minutes. Suture fixation may be used to secure the implant if desired or conditions warrant.
Best Practice: Once the implant is secured, surgeons can gently place their thumb over it and hold pressure for 2-3 minutes. Cycle the knee 10-15 times to ensure MACI is securely adhered.
MACI Surgery Training and Development
If you are ready to introduce the MACI procedure to your patients with knee cartilage injuries, complete the MACI surgeon training at MACI University.
Note: the FDA requires MACI surgeon training before performing your first MACI procedure.
For additional training and education on the MACI procedure, download the Touch Surgery app simulation on the App Store or Google Play to start your training.
Please see below for full indication and ISI.
